# 本地存储的rsync服务功能
# 服务说明
# 什么是rsync
rsync是一个开源的项目,该项目提供快速、增量的文件同步,该项目的主页为:rsync项目主页 (opens new window)。本地存储服务提供rsync功能,除了FTP管理存储中的文件外,您也可以通过rsync客户端实现文件的增量更新。
请注意rsync客户端版本
当前云存储提供的rsync的版本为31.x及以上,较多Linux系统默认提供的rsync版本为2X,需要升级rsync客户端版本后再使用当前服务。
如果版本不正确时,看到的错误信息如下:
@ERROR: protocol version must be 31.0
rsync error: error starting client-server protocol (code 5) at main.c(1503) [sender=3.0.6]
# rsync的版本要求
当前云存储提供的rsync的版本为3.1.x,当前较多Linux系统默认提供的rsync版本为2.x.x或者3.0.x,需要升级rsync客户端版本后再使用当前服务。
通过执行命令rsync --version可以查询当前系统安装的rsync客户端版本:
# rsync --version
rsync  version 3.0.6  protocol version 30
Copyright (C) 1996-2009 by Andrew Tridgell, Wayne Davison, and others.
Web site: http://rsync.samba.org/
Capabilities:
    64-bit files, 64-bit inums, 64-bit timestamps, 64-bit long ints,
    socketpairs, hardlinks, symlinks, IPv6, batchfiles, inplace,
    append, ACLs, xattrs, iconv, symtimes

rsync comes with ABSOLUTELY NO WARRANTY.  This is free software, and you
are welcome to redistribute it under certain conditions.  See the GNU
General Public Licence for details.
说明
当前机器的rsync版本较低,不满足条件,需要重新编译安装。
# 服务开启条件
本地存储的rsync服务支持对通过非个人实名认证的用户或者购买了新浪云企业服务的用户开放。
# 开启服务
# 进入本地存储管理面板
访问https://block.sinacloud.com (opens new window)进入本地存储的管理中心,点击“管理”进入存储的管理中心:

# 进入rsync模块
从左侧导航选择“rsync服务”进入rsync管理面板:
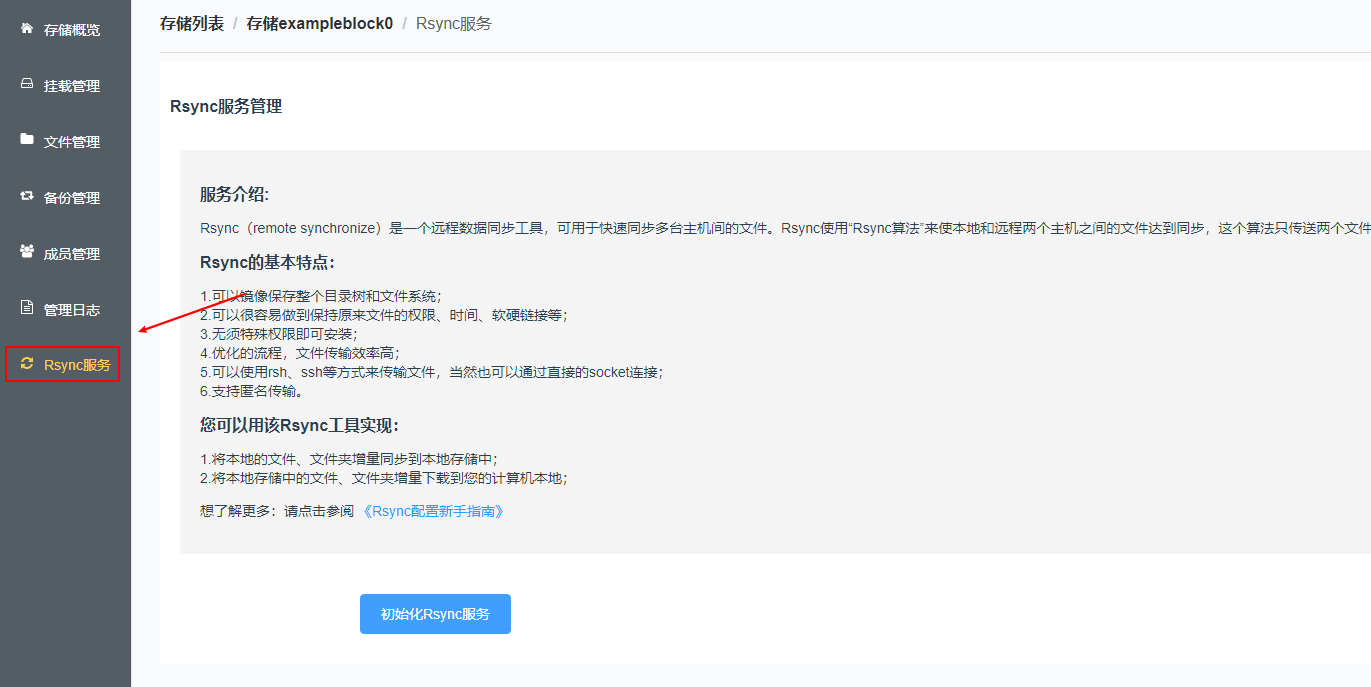
# 开启服务
点击“初始化Rsync服务”即可开启服务。
WARNING
如果创建按钮不可点击,则说明您没有满足服务的开启条件。
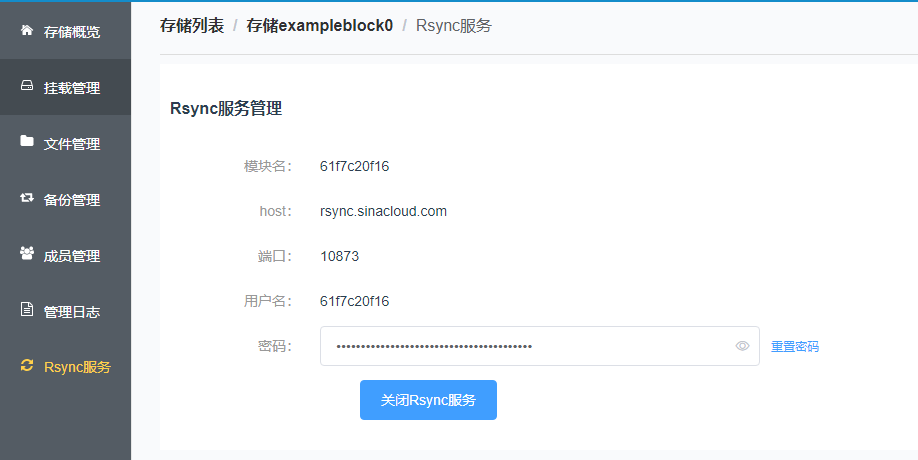
初始化服务后,页面会展示出rsync的地址、端口、模块名、用户名、端口。
# 关闭服务
开启rsync服务后,从rsync管理页面点击“关闭Rsync服务”按钮即可关闭服务,关闭rsync服务后,之前生成的rsync服务连接信息立即失效。
# 重置rsync服务密码
开启rsync服务后,从rsync管理页面的密码框后点击“重置密码”按钮即可重置服务密码,重置后原密码将立即失效。

# 安装rsync
如果您的本地没有rsync客户端,请参考以下说明从本地安装rsync客户端。
# Windows下rsync安装
Windows下需要安装Cygwin64安装rsync客户端。
先从Cygwin64官网下载 (opens new window) set-up.exe安装程序,完成安装,安装完成再次运行setup程序,按以下步骤继续安装rsync模块:
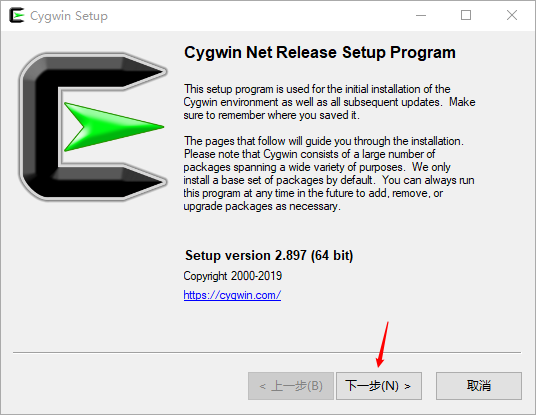
选择“下一步”,
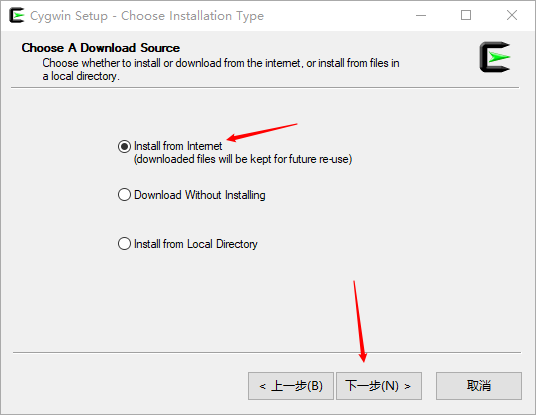
选择“install from Internet”,点击“下一步”:
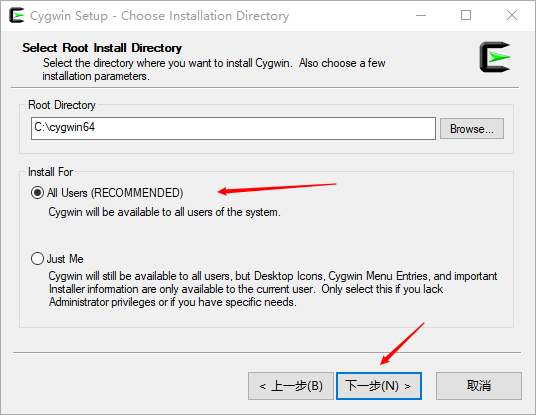
选择默认配置,点击“下一步”:
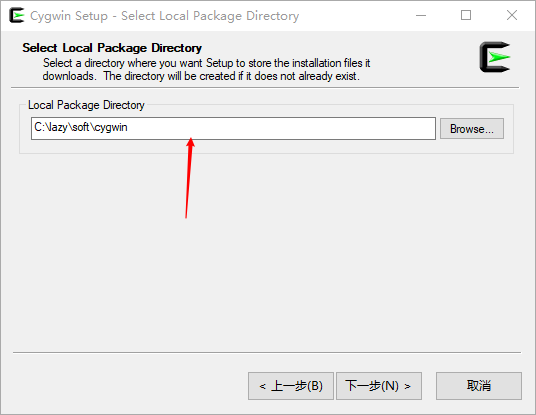
选择默认配置,点击“下一步”:

选择“use system proxy settings”,点击下一步:
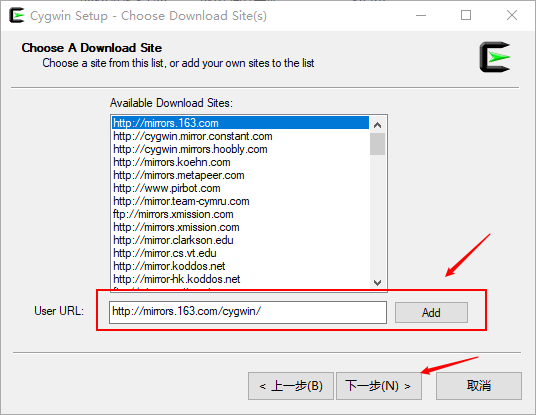
从“User URL”处输入:
http://mirrors.163.com/cygwin/
点击“Add”,然后点击下一步:
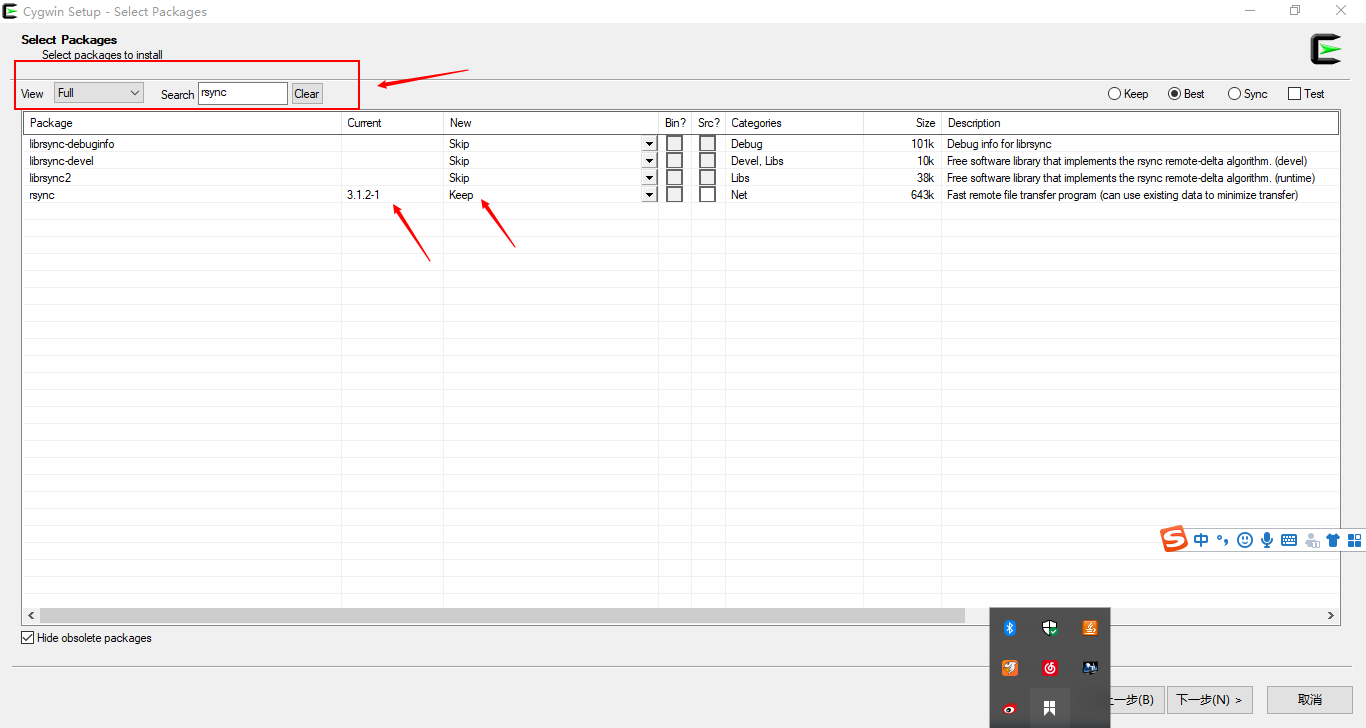
搜索rsync,将rsync模块的状态改为Keep,点击“下一步”完成安装即可。
安装完成后,进入Cygwin64 Terminal,执行命令rsync --version即可查询当前rsync服务的版本:
37708@DESKTOP-09O0QT9 ~
$ rsync --version
rsync  version 3.1.2  protocol version 31
Copyright (C) 1996-2015 by Andrew Tridgell, Wayne Davison, and others.
Web site: http://rsync.samba.org/
Capabilities:
    64-bit files, 64-bit inums, 64-bit timestamps, 64-bit long ints,
    socketpairs, hardlinks, symlinks, IPv6, batchfiles, inplace,
    append, ACLs, no xattrs, iconv, symtimes, prealloc

rsync comes with ABSOLUTELY NO WARRANTY.  This is free software, and you
are welcome to redistribute it under certain conditions.  See the GNU
General Public Licence for details.
到此,Windows下的rsync服务即安装完成。
# Linux下rsync安装
在Linux环境,建议编译安装rsync服务。
1、从http://rsync.samba.org/ (opens new window)下载源码:
wget 'http://sinacloud.net/opensource/rsync/rsync-3.1.3.tar.gz'
说明
如果提示没有wget命令,可以执行yum install wget安装wget程序。
2、解压压缩包
执行命令tar -zxvf rsync-3.1.3.tar.gz解压下载的压缩包:
3、进入解压后的文件夹
cd rsync-3.1.3
4、执行configure
./configure --prefix=/usr/local/rsync/
执行完成后输入如下:
......
configure.sh: creating ./config.status
config.status: creating Makefile
config.status: creating lib/dummy
config.status: creating zlib/dummy
config.status: creating popt/dummy
config.status: creating shconfig
config.status: creating config.h

    rsync 3.1.3 configuration successful

    Note that yodl2man was not found, so pre-existing manpage files will be
    used w/o change (if available) -- no .yo file changes will be used.
5、make && make install
执行make && make install完成编译和安装:
编译及安装完成后的输入格式如下:
......
sed 's;\@stunnel4\@;stunnel;g' <./stunnel-rsync.in >stunnel-rsync
sed 's;\@bindir\@;/usr/local/rsync/bin;g' <./stunnel-rsyncd.conf.in >stunnel-rsyncd.conf
/bin/mkdir -p /usr/local/rsync/bin
/usr/bin/install -c  -m 755 rsync /usr/local/rsync/bin
/bin/mkdir -p /usr/local/rsync/share/man/man1
/bin/mkdir -p /usr/local/rsync/share/man/man5
if test -f rsync.1; then /usr/bin/install -c -m 644 rsync.1 /usr/local/rsync/share/man/man1; fi
if test -f rsyncd.conf.5; then /usr/bin/install -c -m 644 rsyncd.conf.5 /usr/local/rsync/share/man/man5; fi
6、验证安装的版本
执行/usr/local/rsync/bin/rsync --version查询安装的版本,其中/usr/local/rsync/bin/rsync为rsync可执行程序的绝对路径。
执行后输出信息如下:
# /usr/local/rsync/bin/rsync --version
rsync  version 3.1.3  protocol version 31
Copyright (C) 1996-2018 by Andrew Tridgell, Wayne Davison, and others.
Web site: http://rsync.samba.org/
Capabilities:
    64-bit files, 64-bit inums, 64-bit timestamps, 64-bit long ints,
    socketpairs, hardlinks, symlinks, IPv6, batchfiles, inplace,
    append, no ACLs, xattrs, iconv, symtimes, prealloc

rsync comes with ABSOLUTELY NO WARRANTY.  This is free software, and you
are welcome to redistribute it under certain conditions.  See the GNU
General Public Licence for details.
可以看到,安装的rsync的版本为3.1.3,已经满足了系统的需求。
# 同步文件
您可以通过以下几种方式同步本地的文件或者文件夹到远程。
# 手工输入密码
执行命令将本地的tidb-master文件夹传输到远程的xxxx2文件夹下,命令如下:
rsync.exe --port 10873 -avz tidb-master/ 61f7c20f16@rsync.sinacloud.com::61f7c20f16/xxxx2/
在弹出的输入密码处输入rsync服务的密码。
注意
- 示例以Windows环境为例,如果是在其他操作系统下,将rsync.exe替换为rsync的命令执行绝对路径即可。
61f7c20f16@rsync.sinacloud.com::61f7c20f16中的第一个61f7c20f16是用户名,::后的61f7c20f16是模块名称,固定和用户一致,不可忽略。
执行成功后输入信息如下:
**************
vendor/github.com/StackExchange/wmi/LICENSE
vendor/github.com/StackExchange/wmi/README.md
vendor/github.com/StackExchange/wmi/swbemservices.go
vendor/github.com/StackExchange/wmi/wmi.go
vendor/github.com/beorn7/
vendor/github.com/beorn7/perks/
vendor/github.com/beorn7/perks/LICENSE
vendor/github.com/beorn7/perks/quantile/
vendor/github.com/beorn7/perks/quantile/exampledata.txt
vendor/github.com/beorn7/perks/quantile/stream.go

sent 228,519,730 bytes  received 631,443 bytes  403,080.34 bytes/sec
total size is 464,726,096  speedup is 2.03
# 将密码保存到本地文件
有时,需要编程实现本地文件和本地存储服务中的文件同步,不能每次都手工输入密码。rsync服务也支持将密码保存到本地的文件中,需要注意的是,保存rsync密码的文件权限必须为600。
1、将密码写入到/etc/rsync_password
echo "YOUR PASSWORD" > /etc/rsync_password
2、将密码文件的权限改为600
chmod 600 /etc/rsync_password
不修改权限时
如果不修改密码文件的权限,则提示的报错信息为ERROR: password file must not be other-accessible
3、执行同步命令时指定密码文件位置
/usr/local/rsync/bin/rsync --port 10873 -avz --progress --stats --password-file=/etc/rsync_password test.php 61f7c20f16@rsync.sinacloud.com::61f7c20f16/xxxx2/
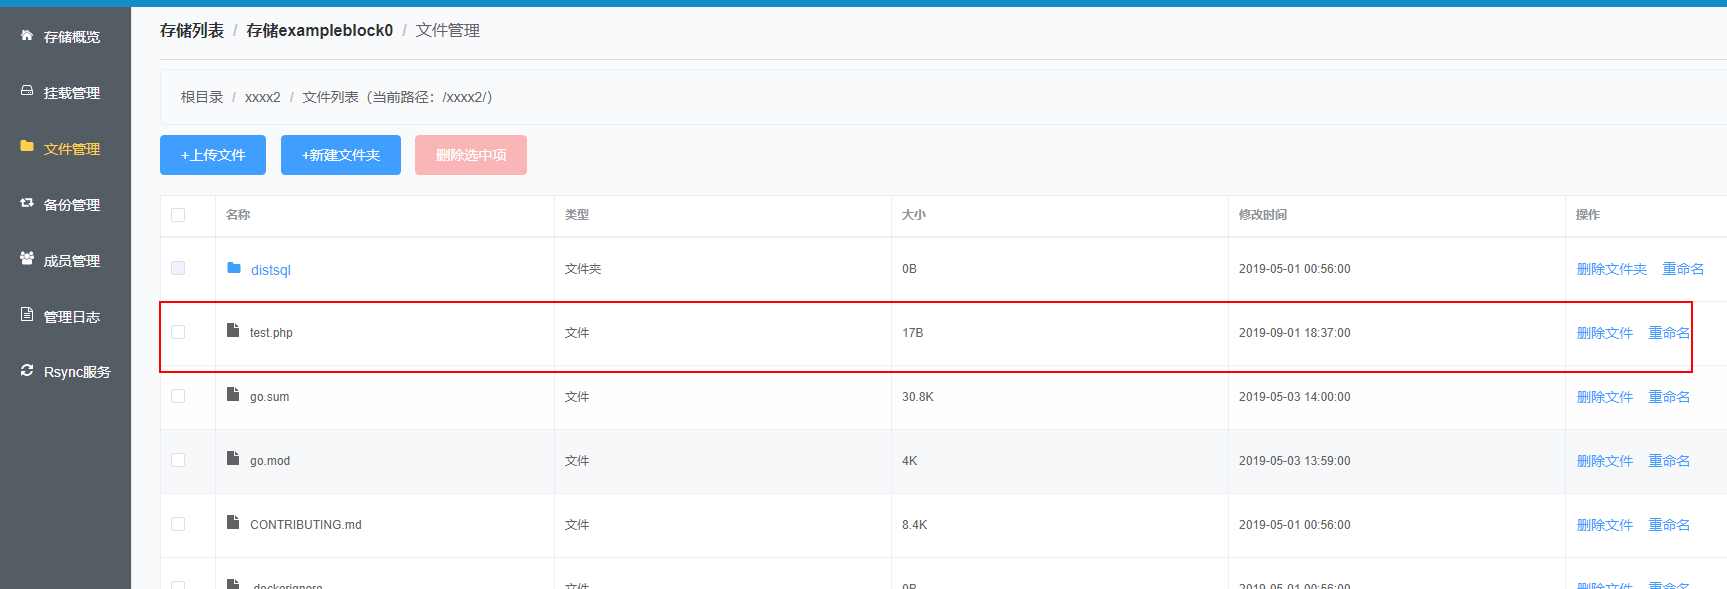
将本地的test.php文件同步到远程的xxxx2文件夹下。
执行后输出如下:
/usr/local/rsync/bin/rsync --port 10873 -avz --progress --stats --password-file=/etc/rsync_password test.php 61f7c20f16@rsync.sinacloud.com::61f7c20f16/xxxx2/
sending incremental file list
test.php

sent 107 bytes  received 35 bytes  94.67 bytes/sec
total size is 17  speedup is 0.12
可以看到系统已经不再弹出需要输入密码的确认框,而是直接同步了文件。
从远程看, test.php文件已经上传到xxxx2文件夹下: